Friday, March 22, 2013

Voice Recognition VR Module Review

Voice Recognition VR kit is one product we always wanted to have in our product lines. Only a handful of specialty manufacturers build this board. This makes them incredibly hard to find, not to mention the high price tag that usually comes with it.

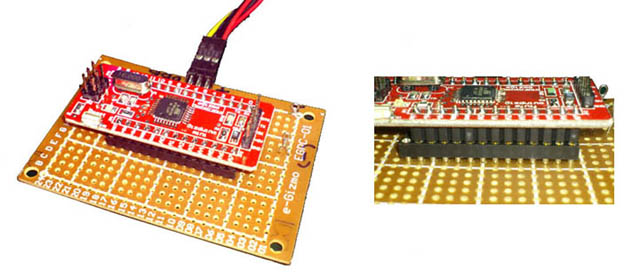
That’s why when our first VR module sample arrived a couple of days ago, I was not able to contain my excitement in such a way that I simply dropped everything else and set to immediately start examining and evaluating the VR module. After a brief struggle with the manual testing my reading comprehension, I hooked up the VR with a gizDuino, and worked an Arduino sketch to test and demonstrate its core VR functions.

Following is a short summary of VR module features:

Up to 15 speaker dependent SD voice commands
organized as 3 groups of 5 voice commands each. Due to limited capacity of the on board voice controller, it can only process one group, or 5 voice commands at a time. The host controller takes the responsibility of loading the appropriate voice command set.  Each SD voice command can be up to 1.3 seconds long. 

Non- volatile voice commands storage.
The VR module retains all voice commands prints even after power cycling. Voice commands will only be replaced or erased at the instruction of the host controller.

UART TTL interface.
This allows it to connect with any 5V MCU host that is similarly equipped with UART port. It can even interface directly with 3.3V MCU host as long as the host input is 5V tolerant.


Another BUG Bites the Plus (gizDuino +)

A bug had been discovered by e-Gizmo on the IDE software that will affect the gizDuino plus boards using the

ATMEGA644P/ATMEGA324P/ATMEGA164P processors.

There is a pin mix-up occurring on the analogRead() function. Specifically, the analogRead() function returns an analog readout from a port not on the one you specified in the function. Furthermore, these pin seems to change if you recompile the code using a different processor. While a quick workaround can be effected (by a user remap of the pin assignment), it is nevertheless a huge potential source of confusion and trouble.

This bug was fixed with the most recent update of the (click link >) gizDuino Patch file.

Patch Files to Add gizDuino in Arduino IDE Board List Menu (Updated November 12, 2015)

Our recent additions of many Arduino compatibles controller board products is now causing a lot of confusion in the board selection during the Arduino IDE set up. It became essential for us to create a board list, a patch file if you will, so that our gizDuino (Arduino Compatible) lines could now appear as well in the Arduino IDE Tools>Board list.

The Arduino IDE bundled with gizDuino already had the software patch installed, hence you will now see gizDuino variants listed among the Arduino board list. If your current Arduino IDE installation does not shows the gizDuino lines, you can install the patch files yourself by following this simple procedure:

What’s Cooking @ e-Gizmo Episode 10: Introducing gizDuino Plus (gizDuino+)

In line with our current effort to expand our gizDuino line (Arduino compatible MCU platform), gizDuino mini was introduced about a month ago. These boards are preloaded with Arduino optiboot bootloader, has a breadboard friendly pin spacing, and has just the bare essentials on board for a complete ready-to-deploy microcontroller platform.

A few weeks later, we quietly added the gizDuino plus mini series (gizDuino+ mini). This board is inspired by the Sanguino project, an off-shoot of the Arduino project (or Wiring project, as some people may insists). It is also Arduino IDE compatible, meaning, you can use the same Arduino SDK and Libraries, plus the Sanguino libraries. Probably the most important difference is, it has more I/O than the gizDuino, an additional of 12 I/Os in fact.

But this blog is not just all about gizDuino+ minis…

What’s Cooking @ e-Gizmo Episode 9: gizDuino mini

The growing popularity of the Arduino platform among our locals is nothing short of phenomenal. Before we introduced gizDuino (Arduino compatible hardware platform) about a couple of years ago, Arduino is practically as foreign as it sounded to our locals, though it is already making its waves big time in other countries. I am aware that a few individuals and companies actually made an attempt to market their own Arduino compatibles locally, but ended up with little success.

The Arduino Team. They created the Arduino, and gave it to the world. We owe it to these guys.
(back) Dave Mellis, Tom Igoe; (front) Gianluca Martino, David Cuartielles, Massimo Banzi
Photo Credit: http://www.arduino.cc
When we first toyed with the idea of bringing in the Arduino, I was a bit reluctant. It featured something that gave me a bit of discomfort – it was too easy to use. Why would that be a problem? Ease of use has its consequences. So much details are hidden when one start working at the top (Arduino) level. My worst fear is people may go about using it without ever learning the basics (of microcontrollers and peripherals).

But ease of use, on the other hand, has its advantages too. There is that likelihood that ease of use can lure more people to try their hands with it, hence, through it, enters the world of microcontrollers and their applications. That’s a strong reason that convinced me to go ahead building our local version of the Arduino hardware- the gizDuino.

And so with the help of friends (of e-Gizmo) and a lot of noises, we got the attention of our locals – teachers, students, and hobbyists. Two years thereafter, everybody now wants an Arduino (gizDuino).


Introducing gizDuino minis

Encouraged by the wide acceptance of our gizDuino, we are now introducing several hardware variants of the gizDuino, starting with the mini lines. 

The gizDuino minis are fully functional Arduino compatibles in small PCB footprint. They have the crystal and reset circuit on board and are all preloaded with arduino bootloader. I/O pins are arranged in standard 600mils DIP size so that you can now plug and use these with your breadboards and protoboards, just like a regular 600mil wide DIP package IC. They are perfect for permanent deployment to end products since the board assembly does not carry much excess baggage, not to mention their low cost.


A USB programmer dongle for the gizDuino mini can be built easily using an e-Gizmo USB to UART converter kit. If that sounds like a hard work to you, you can buy a ready to use kit from e-Gizmo.  

A separate USB to UART converter board is required to program the gizDuino minis using the Arduino IDE. Should you decide to level up and want to program the device using advance programming tools, such as winAVR, an ICSP in-circuit programming port is present on-board. 

 USB-UART kit wired for use as a gizDuino mini programming dongle.


gizDuino mini can be used on breadboards and prototyping PCBs. It will even fit with ordinary IC sockets should you want to use one for it.


gizDuino minis will be initially available in four variants, listed as follows according to the MCU type. This gives you the option to pick one suitable enough for the intended application- no more paying for extras you do not need.

gizDuino mini             Bootloader           MCU              Memory Size          Speed
gizDuino mini8           Optiboot           ATMEGA8L              8K Flash            8MHz
gizDuino mini88         Bootloader        ATMEGA88               8K Flash          16MHz
gizDuino mini168       Optiboot          ATMEGA168             16K Flash          16MHz
gizDuino mini328       Optiboot          ATMEGA328             32K Flash          16MHz
 
gizDuino minis are also available without the I/O header pins installed. This gives you freedom to choose and install the type of connectors more suitable for your kind of assembly.

What’s Cooking @e-Gizmo- Episode 8: Going Audio!

As I mentioned in my earlier blogs, we figured it is time to expand our DIY products to include traditional analog electronics kits as well. The last few weeks, I busied myself designing audio amplifier kits. …Yes, you read it right, audio amplifier kits.

It’s not like the local hobby market has a shortage for this stuff. The local hobby market is indeed flooded with this stuff, that adding one more may seem to counter wisdom. But we at e-Gizmo has an important resources at hand that will set our kits apart from the rest.

Experience. We, or rather, I worked for at least 20 years designing among other things, O.E.M. audio products, distributed by a large  American electronics chain of stores bearing its brand. I was involved not just with design, but with almost every engineering aspect of the manufacturing lines, up to product quality assurance.

Equipment. Our lab is likewise properly equipped to do comprehensive audio test and qualifications. I am knowledgeable with industry accepted audio test procedures. Hence, you can be sure that the performance figures we will present with the product are gathered through actual tests and measurements, and not just copied from the IC device datasheet.

This will probably surprise you, but the actual performance of the product depends largely on the way the end product is designed and built. For example, even a high performance IC, if built on a poorly designed PCB, will not perform quite well. IC datasheet specifications indicate only how well the IC can perform, and cannot be used to assume that it performs as such. An actual measurement is required.

Introducing: e-Gizmo Audio Kit Product lines

These are what I came up with so far – our initial audio product offerings, and a preview of more to come:

Low Power 0.5W Audio Amplifier with On Board Loudspeaker

This general purpose low power audio amplifier will be a welcome addition to your electronics project building toolkit. Just hook it up on a 5-12VDC power source and it is ready to go. The amplifier has a built in loudspeaker, and the PCB functions as the front speaker baffle corner mounting holes.

Medium Power 5W + 5W  rms(sine average) 2 channel Audio Amplifier

This is a low cost, medium power stereo amplifier with sufficient output power for medium fidelity sound reproduction. You can use it to boost the music output of your personal players. When used to drive bookshelf loudspeakers, the sound output will be loud enough to fill every corner of a fairly large room with good fidelity music. You will find it quite useful as a test amplifier on your workbench.

20W+20W rms(sine average) BTL  Stereo Audio Amplifier

  
A 20W per channel stereo amplifier cut out for automotive applications. If you are thinking of building a DIY amplifier for your motorbike, you just found the right stuff. It has enough reserve power to impress your friends with its clean music power even in a noisy environment. The amplifier will work with supply voltage of 9-18VDC. Lower supply voltage results in lower power output capability.

The 20W Amplifier has a pretty good THD+Noise performance (0.05%) as actual measurement in our lab reveals. Frequency response is flat within the 20Hz-20Khz audio bandwidth. This qualifies it for use as a hi-fi home amplifier as well. A more elaborate measured data will be published with the product documentation of this amplifier.


Programmable Preamplifier and Tone Control

Still under development is a universal preamplifier and tone control module that can be incorporated with any audio amplifier. The preamplifier employs digital control to keep all signal paths within the board, hence minimizing noises, crosstalk, interference, and ugly wirings that typically plague DIY built audio equipment. Volume, Bass, and Treble control, even input selector, are all digitally controlled.

  
Probably, the most striking feature of this preamplifier is, the controller module (MCU board) is user programmable. It employs an AVR microcontroller with Arduino bootloader- yes, you can program it and add features if you want to using the all popular Arduino IDE environment! For example, you can add a Bluetooth module and have it remotely controlled using your Bluetooth enabled PC or android phone.

Future Prospects

As I am writing this blog, I am already looking for the next member of this series. A 40W to 60W Audio Amplifier is next in order, and with little encouragement coming from you, we will take a shot at the >100W heavyweight division.  
  

e-Gizmo turns 8!

e-Gizmo is now on its 8th year of serving the Filipino electronics and robotics geeks. Wow! Thank you! I really don’t know what to say. It is so unreal. Thank you so much for your continuing support!

Looking back, the early years of e-Gizmo is not much different from the tales and experiences often foretold in running a business the first time. The first three years was particularly hard. Everyday of our existence we have to deal with the prospect of bankruptcy (we were in fact bankrupt then by any measure). Every centavo we had were spent to keep e-Gizmo open for a day more. We could not even bring home money to feed our families. We depended mainly on the sustenance of our families to go through these difficult times

Nobody really thought e-Gizmo could make it or even continue operating for very long. After all, we, the cofounders of e-gizmo, are just a couple of dudes who knew very little in running a business. We are dreamers, armed only with a strong desire to do what we liked doing most: building circuits and gadgets. But what we lacked in business skill is compensated by our long history of experience in electronics design and manufacturing. And on top of that, we have your continued patronage. Thanks to you, we did the unlikely.

e-Gizmo Kits: Should our kits be made to look like, hmmn… kits?

During the early years of e-Gizmo, one major decision we have to make was how we want to present our kits. During those years, the prevailing mindset is DIY kits should be made to appear like one: a jumbled collection of parts soldered over an ugly printed circuit board. The uglier it is the better. Even up to the present, most local kit manufacturers built their kit around the cheapest Printed Circuit Board (PCB) base material available: single sided, paper phenolic base material. Not a problem, really, were it not for the fact they are manufactured using hopelessly ancient, crude and sloppy techniques. Don’t look for quality, you cannot even hope for one. The PCBs are so badly made that building a circuit out of these guarantees a little chance of success in making your kit work the first time. Yet, in a strange and mind boggling manner, this is what the customers actually want!

Being a hobbyist myself, I understood the reason why. We’ve been exposed with sub par kits far too long that we are conditioned us to believe that DIY kit should not appear professionally made. Otherwise, nobody will believe that you made it yourself. Should we conform to the current trend and simply do what everybody else was doing? We decided its time we change all this. Going against the advice of friends and close colleagues, we gambled and use high quality commercial grade PCBs on our kits. We are probably the first local kit provider that consistently used high grade FR4 plated through holes PCBs with our kits.

The next leap: Use of Surface Mount Devices SMD

A better PCB is just the start. The next questions is whether to go with another conventional wisdom that favors through hole components over surface mount devices (SMD) components. Through holes components are still preferred because they are easier to work with, and so they say. Nothing could be farther from the truth. Actually it is the other way around. The only reasons we hobbyists thinks that way is we never tried working with them in the first place. Soldering SMD components may difficult the first time, but once you got the hang of it, you will never turn back. Take this from a middle age man with failing eyesight, but still find more joy in working with SMD components.

So here, we took another “risk”, as we opted to use SMD components in our kits. We find it a lot easier and faster to assemble the kits resulting with the best quality. But more importantly, through-hole components are on their way out. Their days are numbered. Volume manufacturers don’t want them anymore. SMD is the future of electronics. You don’t want to hone your skill to a technology that is going obsolete.

Better Home Grown Kits

Those two decisions proved pivotal in the success of e-Gizmo and earning us a reputation as a high quality electronics kit provider, In fact, even those who had been in the kit business long before us are now following our lead. They too started using good quality PCBs to build their own kits; some are now even doing SMDs too. Finally, our local hobbyists and students are getting good quality kits they long deserved.

We will continue to work hard to give you better kits all the time. This will be our lasting commitment to you. Once again, thank you and happy building!